
Learn how to use the VL53L0X laser distance sensor in this Arduino project. The VL53L0X laser distance sensor provides millimeter-level accuracy for robotics, drones, automation, and more. In this guide, we’ll explore the VL53L0X laser distance sensor working, wiring, Arduino code, and real-world applications.
The VL53L0X laser distance sensor is compact, reliable, and precise, making it perfect for DIY electronics. This article shows how the VL53L0X laser distance sensor can be connected to Arduino, programmed using the Adafruit VL53L0X library, and tested for real-time distance measurements. If you’re looking to learn how to integrate the VL53L0X laser distance sensor in your Arduino project, this complete tutorial explains everything step by step.
Introduction
Hi friends, in this project we are going to see how we can measure distance with a VL53L0X laser distance sensor. These sensors use laser-based technology to measure distance with high accuracy and precision.
The sensor we are going to use is the VL53L0X Time-of-Flight (ToF) distance sensor, developed by STMicroelectronics.
Unlike ultrasonic sensors that rely on sound waves, the VL53L0X uses a 940 nm infrared laser to measure the time it takes for light to bounce back from a surface. This allows the sensor to achieve millimeter-level precision over a measurement range of 3 cm to 2 m.
Because of its accuracy, small size, and low power consumption, the VL53L0X is widely used in:
Robotics obstacle detection
Drones for altitude hold
Industrial automation
Gesture recognition systems
Smart home projects
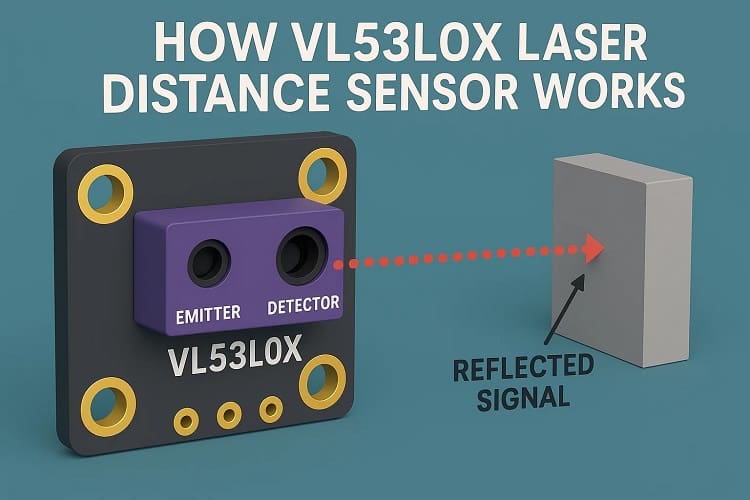
How the VL53L0X Works
The VL53L0X emits a 940 nm laser pulse.
The light hits an object and reflects back to the sensor.
The sensor measures the time of flight (the time it takes for the light to travel back).
Using this information, it calculates distance with mm precision.
This is faster and more reliable than ultrasonic sensors because sound speed changes with temperature and humidity, while light speed remains constant in air.
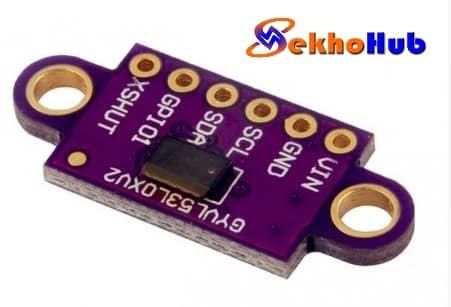
VL53L0X Pinout.
| Pin | Name | Function |
|---|---|---|
| VCC | Power Supply | Connects to 3.3V or 5V (most breakout boards have onboard regulator). |
| GND | Ground | Connects to Arduino GND. |
| SDA | Serial Data | I2C data line, connect to Arduino A4 (Uno/Nano) or D21 (Mega/ESP32). |
| SCL | Serial Clock | I2C clock line, connect to Arduino A5 (Uno/Nano) or D22 (Mega/ESP32). |
| XSHUT | Shutdown Pin | Used to power down or reset the sensor (active low). Optional. |
| GPIO1 | Interrupt Pin | Outputs an interrupt signal when a measurement is ready. Optional. |
Materials for the Project
| S.No | Component | Quantity | Buy Link |
|---|---|---|---|
| 1 | Arduino Nano | 1 | Buy Here |
| 2 | VL53L0X Laser Distance Sensor Module | 1 | Buy Here |
| 3 | Breadboard | 1 | Buy Here |
| 4 | Jumper Wires (Male to Male) | 1 set | Buy Here |
| 5 | USB Cable for Arduino | 1 | Buy Here |
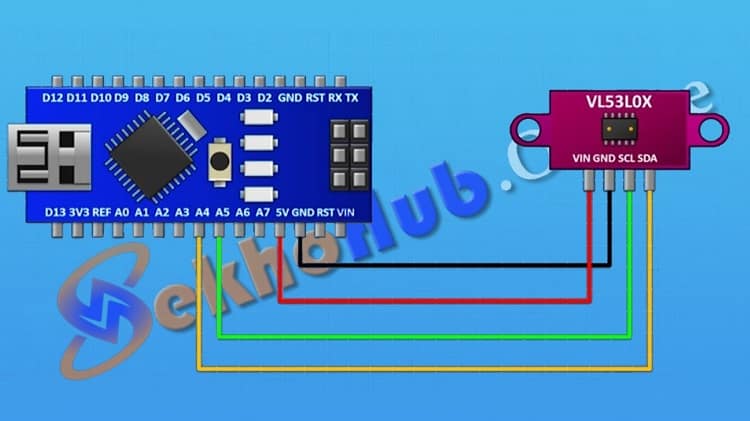
Circuit Diagram and Connections
The VL53L0X communicates with Arduino .
VCC → 5V (Arduino)
GND → GND (Arduino)
SCL → A5 (Arduino Nano)
SDA → A4 (Arduino Nano)
Installing the Required Library
We need to install the Adafruit VL53L0X library to make coding easier.
Open Arduino IDE.
Go to Sketch → Include Library → Manage Libraries.
Search for VL53L0X.
Install Adafruit VL53L0X library.
Arduino Code.
#include “Adafruit_VL53L0X.h”
Adafruit_VL53L0X lox = Adafruit_VL53L0X();
void setup() {
Serial.begin(9600);
while (!Serial) {
delay(1);
}
Serial.println(“VL53L0X Test”);
if (!lox.begin()) {
Serial.println(F(“Failed to find VL53L0X sensor!”));
while (1);
}
}
void loop() {
VL53L0X_RangingMeasurementData_t measure;
lox.rangingTest(&measure, false);
if (measure.RangeStatus != 4) {
Serial.print(“Distance (mm): “);
Serial.println(measure.RangeMilliMeter);
} else {
Serial.println(“Out of range”);
}
delay(100);
}
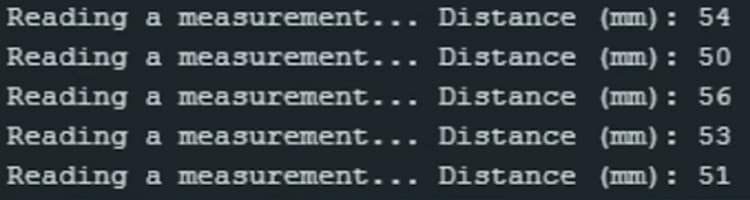
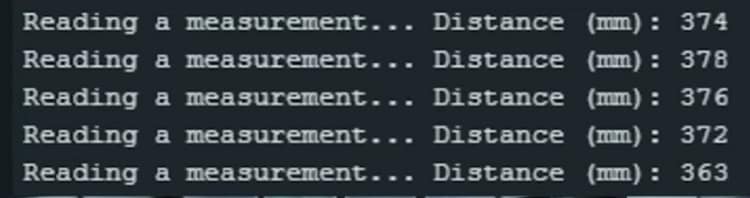
Upload this code to your Arduino, open the Serial Monitor, and you’ll see distance values in millimeters.
Step-by-Step Guide
Assemble the components: Place Arduino and VL53L0X on a breadboard.
Make the connections: Use jumper wires to connect SDA, SCL, VCC, and GND.
Install the library: Download and install the Adafruit VL53L0X library.
Upload the code: Copy the given code into Arduino IDE.
Test the sensor: Open the Serial Monitor to view live distance readings.
Applications of VL53L0X with Arduino
Robotics: Obstacle detection and navigation.
Drones: Height sensing and terrain following.
Smart Home: Gesture recognition for touchless switches.
Industrial Use: Object detection in conveyor belts.
DIY Projects: Automatic doors, counters, and proximity alerts.
FAQs
Q1: What is the range of VL53L0X sensor?
The VL53L0X can measure from 30 mm to 2 meters reliably.
Q2: Does VL53L0X work outdoors?
Yes, but strong sunlight may affect accuracy. A shaded or indoor environment works best.
Q3: Can VL53L0X replace ultrasonic sensors?
In many cases, yes. It’s more accurate, faster, and compact than ultrasonic sensors.
Q4: What is the operating voltage of VL53L0X?
It typically works on 2.8V logic, but breakout boards include regulators so you can power it with 3.3V or 5V.
Q5: Can multiple VL53L0X sensors be used on one Arduino?
Yes, but you need to change their I2C addresses using software configuration.