
This guide explains how to create an ESP32-C3 Capacitive Touch Counter with Built-in OLED Display. Learn how the ESP32-C3 microcontroller works, explore the ESP32-C3 pinout, and understand its Wi-Fi and Bluetooth capabilities. This project helps electronics enthusiasts and IoT developers master ESP32-C3 programming with Arduino IDE while learning to interface sensors, handle GPIO functions, and display real-time data.
Perfect for beginners exploring ESP32-C3 applications in IoT and for anyone interested in embedded systems design and smart touch-based projects.
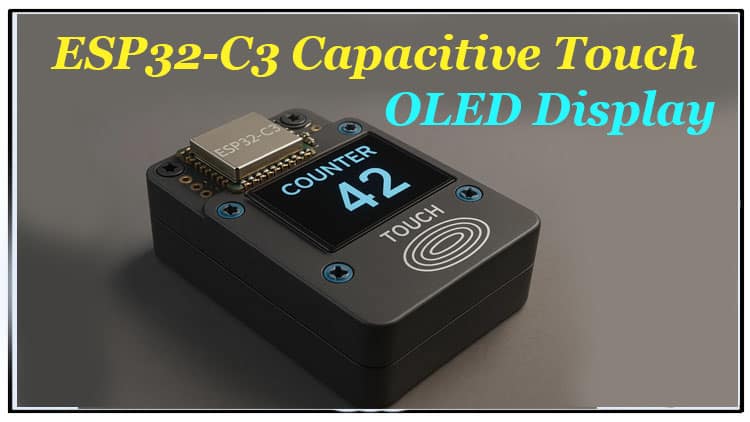
Project Overview
The ESP32-C3 Capacitive Touch Counter with Built-in OLED Display is a compact and interactive project demonstrating how capacitive touch sensing can be used for counting applications. Powered by the ESP32-C3 microcontroller, this project combines IoT development board flexibility, Wi-Fi and Bluetooth features, and an OLED display to show real-time counter data.
This project showcases the simplicity of using the ESP32-C3 development board and how easily touch input can replace traditional mechanical buttons in embedded projects. Using just a few components, it illustrates the efficiency and precision of capacitive sensing in modern electronics.
Components Required
| No | Component | Quantity | Description | Buy Link |
|---|---|---|---|---|
| 1 | Esp32C3 0.42 Oled | 1 | Main microcontroller with Wi-Fi and Bluetooth | Buy on AliExpress |
| 3 | TTP223 Capacitive Touch Sensor | 1 | Used for touch input counting | Buy on AliExpress |
| 4 | Jumper Wires (Male-to-Female) | As needed | For circuit connections | Buy on AliExpress |
| 5 | Breadboard | 1 | For circuit prototyping | Buy on AliExpress |
| 6 | USB Cable (Micro/Type-C) | 1 | To connect ESP32-C3 to PC | Buy on AliExpress |
ESP32-C3 Pinout.
| Pin | Function | Description |
|---|---|---|
| 3V3 | Power Output | Supplies 3.3V for OLED, sensors, etc. |
| GND | Ground | Common ground |
| GPIO 0 | Boot Mode / Input | Can be used for buttons |
| GPIO 1 | TX | UART TX |
| GPIO 2 | RX | UART RX |
| GPIO 3 | PWM / ADC | Available for peripherals |
| GPIO 4 | Touch Input | Used for capacitive sensor in counter projects |
| GPIO 5 | General Purpose | Usable for output |
| GPIO 6 | I2C SDA | For OLED and I2C devices |
| GPIO 7 | I2C SCL | For OLED and I2C devices |
| GPIO 8–10 | General Purpose | Optional for additional sensors |
| 5V | USB Power | Powers the board through USB |

Wiring Connection
The wiring connections are simple:
VCC → 3.3V
GND → GND
OUT → GPIO 2 (Digital signal output)

The ESP32-C3 pinout provides flexibility, allowing users to map pins according to project needs. With ESP32-C3 GPIO functions, almost all pins can handle multiple tasks, including touch, digital input/output, and analog read.
Library Installation
Before uploading the code, ensure that your Arduino IDE has support for ESP32-C3 programming with Arduino IDE. Follow these steps:
- Open Arduino IDE
- Go to Sketch → Include Library → Manage Libraries
- Search for U8g2
- Click Install
These libraries are essential for displaying data on the OLED screen. Once installed, select ESP32-C3 Dev Module under Tools > Board.
Arduino Code
This simple sketch increments the counter whenever the touch sensor is activated and displays the count on the OLED.
How It Works
The ESP32-C3 microcontroller detects a capacitive change when a finger touches the sensor pad. This change is processed through its internal circuitry and registered as a digital pulse. The Arduino firmware counts these pulses, and the OLED display updates the total count.
Because the ESP32-C3 development board includes built-in Wi-Fi and Bluetooth, the same project can be easily extended to send counter data to a web dashboard or a mobile app, showcasing ESP32-C3 applications in IoT.
The ESP32-C3 vs ESP8266 comparison highlights improved security, better power consumption, and additional GPIO flexibility. With PWM, SPI, and UART capabilities, this microcontroller fits perfectly into a wide range of ESP32-C3 projects for beginners.
For advanced users, MicroPython with ESP32 or ESP-IDF can also be used instead of the Arduino IDE for deeper control and custom firmware design.
Applications
This ESP32-C3 project can be used in various real-world applications, including:
Smart home automation (touch-based lighting or counters)
Industrial counters for machine part detection
Digital scoreboards for small games or counters
IoT sensor data input for cloud dashboards
Embedded systems design training
Wi-Fi IoT controller experiments
The project is an excellent introduction to ESP32-C3 applications in IoT for students and hobbyists exploring modern touch-based interfaces.
Summary
This project demonstrates how to build a capacitive touch counter using the ESP32-C3 microcontroller and a built-in OLED display. It helps learners understand how ESP32-C3 works, from touch input handling to display control.
By using ESP32-C3 programming with Arduino IDE, this project stays beginner-friendly while introducing practical IoT principles. It also shows the advantages of modern ESP32-C3 GPIO functions and pin configuration, making it adaptable for other ESP32 project ideas such as smart switches, counters, and timers.
You can find more similar ESP32-C3 projects and circuit tutorials at SekhoHub.online, where embedded systems and IoT designs are explained in practical, engineer-level detail.
Final Thoughts
The ESP32-C3 Capacitive Touch Counter with Built-in OLED Display is an innovative example of blending touch sensing, Wi-Fi, and Bluetooth connectivity in a compact IoT development board.
For enthusiasts exploring ESP32-C3 applications, this project offers a foundational understanding of touch sensors and display interfacing — while providing room for upgrades like data logging, wireless updates, or serial communication with ESP32 modules.
As technology advances, the ESP32-C3 microcontroller continues to stand out among best ESP32-C3 boards, offering high performance, low ESP32 power consumption, and support for embedded systems design at an affordable cost.
People Also Ask
What is the ESP32-C3 designed for?
The ESP32-C3 is designed for low-power IoT applications, featuring integrated Wi-Fi and Bluetooth connectivity. It supports secure communication and advanced GPIO control for modern embedded systems.
What is the function of ESP32 touch?
The ESP32 touch function detects capacitive changes on touch-sensitive pins. It can replace mechanical buttons, allowing sleek and durable interface designs in smart home automation and portable devices.
How do I reduce power consumption in ESP32-C3?
Reducing ESP32 power consumption involves enabling deep-sleep mode, lowering the CPU frequency, disabling unused peripherals, and managing Wi-Fi and Bluetooth states efficiently.
How to use touch sensor with ESP32?
To use a touch sensor with ESP32-C3, connect the sensor’s output to a GPIO pin configured for touch detection. Program the microcontroller via Arduino IDE or ESP-IDF to read touch events and trigger actions such as counters or toggles.