

Introduction
Measuring force in electronic projects becomes remarkably simple when you understand how to Measure Force using an FSR-based setup. The FSR406 allows smooth interaction by converting applied pressure into readable electrical signals. By combining its variable resistance with an Arduino, you gain the ability to monitor subtle changes in load or touch.
The process relies on a bold Force-sensitive resistor, a stable bold Voltage divider circuit, precise bold Analog voltage reading, correct wiring to an bold Arduino analog pin, and reliable bold Pressure detection. Together, these elements create an efficient system to Measure Force accurately in DIY, robotics, or automation applications.
Understanding the FSR406: How It Helps You Measure Force using FSR406 Force Sensor
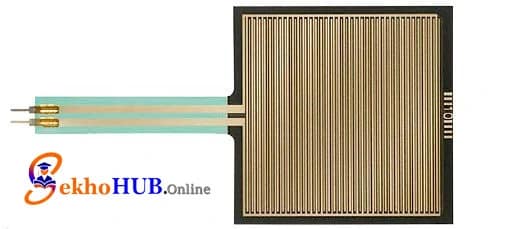
The bold FSR406 is a flexible, polymer-based bold Sensor that reduces its bold Resistance as more pressure or load is applied. Because of this predictable resistance change, it integrates seamlessly with any bold Arduino analog pin. It is ideal for bold Touch and pressure sensing, robotics, human-machine interfaces, and lightweight bold Load measurement with Arduino.
How the Sensor Works
The FSR is formed by two layers containing conductive traces and a semi-conductive polymer. When force is applied:
The conductive particles compress.
Electrical paths form.
Resistance decreases.
bold Analog voltage reading changes proportionally.
This behavior allows precise bold Pressure detection, making it perfect for both hobby-grade and professional builds.
Circuit Overview: Voltage Divider Principle
The heart of this project is a simple bold Voltage divider, consisting of:
The bold FSR406
A fixed 10kΩ resistor
As force is applied:
FSR resistance drops
Voltage at the junction rises
Arduino reads this increase as an bold Analog reading
This method ensures stable, real-time bold Force output.
Components Required
(Internal links added as required.)
Circuit Diagram Explanation

The bold Arduino force measurement circuit consists of the bold FSR with analog input wired through a bold Voltage divider circuit, enabling smooth bold Force to voltage conversion Arduino operations. The OLED communicates via I²C for clear visual feedback.
Connections
FSR406 → Arduino UNO
| FSR Pin | Arduino Pin |
|---|---|
| One side of FSR | 5V |
| Other side of FSR | A0 (connected via 10kΩ resistor to GND) |
OLED (SSD1306 I²C) → Arduino UNO
| OLED Pin | Arduino Pin |
|---|---|
| VCC | 5V |
| GND | GND |
| SCL | A5 |
| SDA | A4 |
")
Step-by-Step Build Guide
Step 1. Place your Arduino UNO on the workbench and prepare your bold DIY setup.
Step 2. Insert the bold FSR406 into the breadboard for stable mounting.
Step 3. Connect one terminal of the FSR to the Arduino 5V line.
Step 4. Connect the other FSR terminal to A0.
Step 5. Add a 10kΩ resistor between A0 and GND to complete the bold Voltage divider.
Step 6. Wire the OLED module:
VCC → 5V
GND → GND
SCL → A5
SDA → A4
Step 7. Power the board and verify wiring continuity.
Step 8. Upload the OLED library and test communication.
Step 9. Upload the main code to read bold Analog voltage reading.
Step 10. Gently apply force on the FSR to observe bold Real-time force monitoring on the OLED.
Sensor Response Curve and Calibration Notes
The FSR’s curve is nonlinear, meaning:
Initial pressure changes cause significant shifts
As load increases, sensitivity drops
Calibration tables help achieve precise bold Sensor calibration
To improve bold Force measurement accuracy:
Use known weights for calibration
Collect multiple data points
Use mapping or polynomial approximation
Arduino Code Example
Applications
bold Soft object pressure sensing
Grip measurement in robotics
Load estimation for smart devices
Human-touch interfaces
DIY automation projects
Force feedback systems
Lightweight pressure-sensing tools
FAQs
1. What is the best way to measure force using FSR?
Using a bold Voltage divider with Arduino provides the most stable readings.
2. How does the FSR406 sensor work?
It changes bold Resistance based on applied pressure.
3. Is the FSR suitable for high-accuracy tasks?
It’s ideal for general use but not laboratory-grade tasks.
4. How do I calibrate the FSR406?
Use known weights, record values, and build a conversion curve.
5. Can I use this sensor in robotics?
Yes, especially for grippers and pressure feedback.
Conclusion
Building a system to Measure Force with an FSR406 and Arduino is one of the most practical ways to explore real-world sensing in electronics. The project demonstrates how a simple bold Force-sensitive resistor, paired with a stable bold Voltage divider circuit, can convert pressure into meaningful data for robotics, automation, and DIY experimentation.
With careful wiring, clean analog sampling, and basic calibration, the sensor becomes a reliable tool for detecting touch, load variations, and subtle movements. Whether you’re enhancing a robotic gripper, creating interactive controls, or studying material behavior, this setup offers a dependable foundation for further innovation.