

 Arduino Complete Guide | All Tips for Beginners and Experts
 Arduino Complete Guide | All Tips for Beginners and Experts
Arduino complete guide with all tips for beginners and experts. This Arduino complete guide explains hardware, software, programming, and practical circuits. Learn Arduino setup, sensors, shields, libraries, debugging, and DIY project ideas. With this Arduino complete guide, beginners and hobbyists can build electronics projects confidently. Explore Arduino complete guide step-by-step for learning.
Introduction
If you’re stepping into electronics, Arduino is the best starting point. It is a versatile open-source microcontroller platform that makes programming and hardware control accessible even for beginners. With over a decade of use in prototyping, IoT, robotics, and embedded systems, Arduino has become a global standard for hobbyists, students, and engineers.
In this article, I’ll walk you through the complete Arduino guide with all tips — from basics to advanced techniques. Whether you want to blink an LED, build a robot, or control home appliances, this guide will give you the roadmap.
What is Arduino?
Arduino is an open-source electronics platform based on:
Hardware: Microcontroller boards like Arduino Uno, Mega, Nano.
Software: Arduino IDE for writing and uploading code.
It bridges coding and electronics in a beginner-friendly way.
Official Arduino documentation: Arduino Official Website
Popular Arduino Boards

Some of the widely used Arduino boards include:
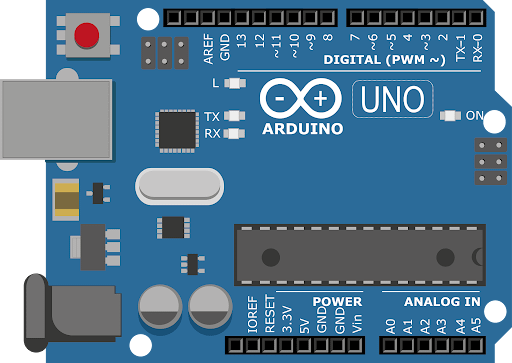
Arduino Uno R3 – Most common, ATmega328P based.
Arduino Nano – Compact version, ideal for breadboards.
Arduino Mega 2560 – More pins and memory for bigger projects.
Arduino Leonardo – USB native support.
Arduino Due – ARM Cortex-based, 32-bit microcontroller.
Essential Components for Arduino Projects
When working with Arduino, you’ll often need these components:
| Component | Use Case |
|---|---|
| Breadboard | Quick prototyping |
| Jumper Wires | Connections |
| LEDs & Resistors | Basics, indicators |
| Push Buttons | Inputs |
| Sensors (Temperature, IR, Ultrasonic) | Data collection |
| Motors & Drivers | Motion control |
| LCD/OLED Displays | Output display |
| Shields (WiFi, Motor Driver, Relay) | Extended functionality |
How Arduino Works
Write Code (Sketch) in Arduino IDE.
Compile the code into machine language.
Upload it to the Arduino board via USB.
Microcontroller executes instructions.
Interacts with sensors, actuators, or displays.
BOM Example for a Simple Arduino Project (LED Blink with Button)
| Component | Quantity | Buy Link |
|---|---|---|
| Arduino Uno | 1 | Arduino Store |
| Breadboard | 1 | SparkFun Breadboard |
| LED | 1 | Adafruit LED Pack |
| 220Ω Resistor | 1 | Mouser Resistor |
| Push Button | 1 | Digi-Key Button |
| Jumper Wires | – | Pololu Wires |

Setting Up Arduino (Step by Step)
Download Arduino IDE → Arduino Software
Install drivers (if needed).
Connect Arduino via USB.
Select Board and COM Port in Tools.
Upload a simple program (Blink LED).
Arduino Tips for Beginners
Start with simple projects (LED, buzzer).
Use sensors gradually (temperature → motion → GPS).
Learn basic C++ syntax.
Double-check wiring before powering.
Always add current limiting resistors with LEDs.
Comment your code for clarity.
Arduino Advanced Tips
Use external power supplies for motors.
Implement interrupts for faster responses.
Learn to use timers and PWM.
Optimize memory with PROGMEM for constants.
Debug using Serial Monitor & Serial Plotter.
Organize large projects with libraries.
Arduino Shields & Expansions
Arduino’s modular design allows attaching shields:
Motor Driver Shield – Control DC/Stepper motors.
Ethernet/Wi-Fi Shield – IoT projects.
Relay Shield – Control AC appliances.
Proto Shield – Custom circuits.
Common Arduino Errors & Fixes
Board not detected: Check USB cable/drivers.
Code won’t upload: Select correct COM port.
Random resets: Use external power instead of USB only.
Sensor not working: Verify wiring & library installation.
Arduino Project Ideas
Automatic Plant Watering System
Ultrasonic Distance Meter
Smart Home Automation
Temperature Data Logger
Bluetooth Controlled Robot
IoT Weather Station
For IoT project tutorials: ThingSpeak IoT Platform
Arduino in Real-World Applications
Robotics
IoT Devices
Wearable Electronics
Smart Agriculture
Medical Prototypes
Home Automation
FAQs
Q1: Is Arduino good for beginners?
Yes, Arduino is one of the easiest platforms for beginners due to its user-friendly IDE and community support.
Q2: Can Arduino run without a computer?
Yes, after uploading the code, Arduino runs independently using external power.
Q3: What language does Arduino use?
Arduino uses a simplified version of C/C++.
Q4: What is the difference between Arduino and Raspberry Pi?
Arduino is a microcontroller (real-time control), while Raspberry Pi is a microprocessor (mini-computer).
Q5: Can I make professional projects with Arduino?
Yes, many prototypes and commercial devices start with Arduino for testing.
Conclusion
This Arduino complete guide with all tips has covered everything from setup, hardware, programming, shields, and project examples to advanced tricks. Whether you’re a beginner blinking LEDs or an engineer working on IoT systems, Arduino empowers you to build, test, and innovate quickly.