

Introduction
Designing an Audio Amplifier 7 Wattr system in pure Class-A style is an excellent way to explore clean analog sound and learn how stable biasing shapes signal behavior. This project focuses on a single-ended topology that delivers clear output while maintaining continuous transistor conduction. The circuit emphasizes proper heat handling, accurate bias settings, and a smooth linear response for dependable performance.
By understanding each stage—from input conditioning to final power delivery you gain practical insight into how a Class-A amplifier maintains clarity and consistency. Technologies such as class-A audio power stage, low-distortion amplifier, 7W audio output stage, single-ended amplifier design, and high-fidelity sound play key roles here.
Audio Amplifier 7 Wattr Overview
To understand the Audio Amplifier 7 Watt Class-A Circuit, we must begin with the signal path. The amplifier uses a fully linear bold(Class-A) conduction mode combined with a bold(single-ended amplifier design) to deliver smooth and uniform signal reproduction across the entire bold(Frequency) band. The front-end stage handles initial bold(Signal) shaping, while the driver and output stages push clean bold(Power) into the speaker load.
This circuit is also an excellent addition for hobby projects you feature on SekhoHub.online, especially under categories like analog audio, DIY amplifiers, and transistor projects.
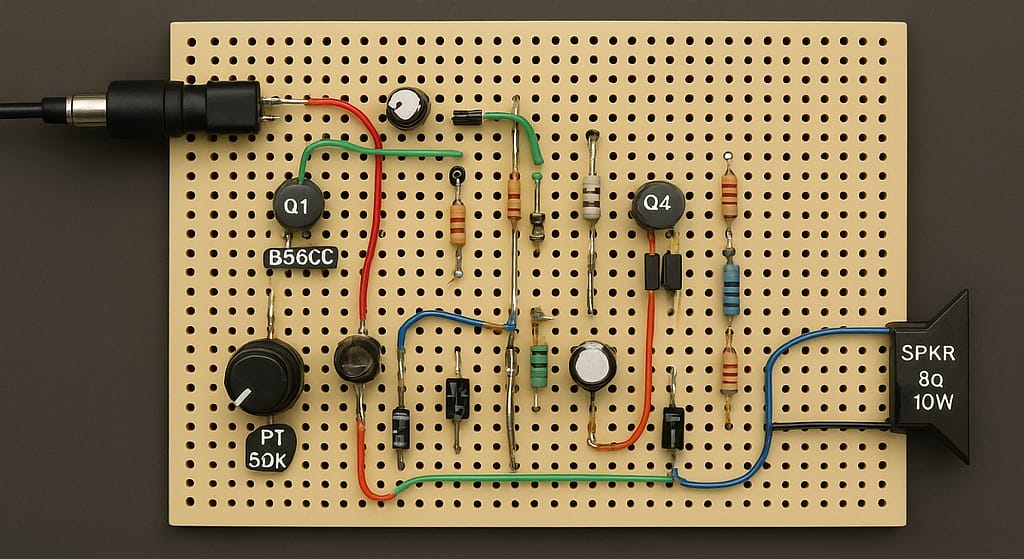
Circuit Diagram

The circuit is composed of three major blocks:
1. Input and Bias Section
This portion sets the gain and ensures stable bold(Bias) conditions. It includes:
Q1 (BC560C PNP): Functions as the first gain stage.
R1, R2 provide a voltage divider for proper bold(biasing network design) and stability.
C1 isolates the DC portion of the incoming audio.
The purpose of Q1 is to maintain a clean initial bold(audio signal amplification) without allowing DC components from your audio source to enter the amplifier.
2. Driver and Linear Control Section
Q2 (BC337) handles bold(transistor linear region performance) and pushes the signal into Q3, the main power transistor. It operates under:
Controlled bold(bias current setting)
Consistent bold(constant current biasing method)
Minimal bold(Distortion)
This section ensures that the amplifier maintains bold(class-A linear operation) across all load conditions.
3. Output Power Stage
The output section includes Q3 (BD437) and Q4 (BD675A). This combination supplies:
Up to bold(7W audio output stage)
Stable bold(Output) current
A linear bold(Class-A audio power stage) operation
Adequate bold(speaker driver amplifier) behavior
With proper heat management, the amplifier can deliver sustained bold(7W audio power output) into an 8-ohm bold(Speaker) load.
The output is routed through C7 to block DC before reaching the final load.
Why Class-A for 7 Watt Audio?
A lot of beginners wonder: why use Class-A when it wastes power? The truth is that Class-A offers:
Extremely low bold(Distortion)
Very clean bold(analog audio design)
Smooth bold(smooth audio reproduction)
No crossover issues like in class-AB
Predictable thermal performance
However, you must control:
bold(transistor heat dissipation)
bold(thermal stability in amplifiers)
Efficiency considerations due to bold(power loss and heat generation)
Key Features of this Amplifier
Works in pure bold(class-A amplifier operation)
Uses discrete transistors
Supports bold(speaker impedance match) down to 8 ohms
Produces bold(high-fidelity sound)
Offers consistent bold(Gain) and sensitivity
Uses simple and widely available components
Component List
| S.No | Component | Value | Qty | Buy Link |
|---|---|---|---|---|
| 1 | Transistor Q1 | BC560C | 1 | Buy |
| Transistor Q2 | BC337 | 1 | Buy | |
| Transistor Q3 | BD437 | 1 | Buy | |
| Transistor Q4 | BD675A | 1 | Buy | |
| 2 | Capacitor C2 | 47µF 25V | 1 | Buy |
| Capacitor C3, C6 | 470µF 25V | 2 | Buy | |
| Capacitor C4 | 220µF 25V | 1 | Buy | |
| Capacitor C7 | 1000µF 25V | 1 | Buy | |
| Capacitor C1 | 470nF | 1 | Buy | |
| Capacitor C5 | 47pF | 1 | Buy | |
| 3 | Resistor R1 | 100k | 1 | Buy |
| R2 | 100k | 1 | Buy | |
| R3 | 8k2 | 1 | Buy | |
| R4, R8 | 100Ω | 2 | Buy | |
| R5 | 2k7 | 1 | Buy | |
| R6 | 1k | 1 | Buy | |
| R7 | 680Ω | 1 | Buy | |
| R9 | 1Ω 1/2W | 1 | Buy | |
| 4 | Potentiometer P1 | 50k log | 1 | Buy |
| 5 | Speaker | 8Ω / 10W | 1 | Buy |
Step-by-Step Build Guide
Step 1. Start by placing Q1, Q2, Q3, and Q4 on your PCB or experimental board and align their pinouts.
Step 2. Solder the input coupling capacitor C1 between the volume potentiometer and Q1 base.
Step 3. Connect R1 and R2 to form the input bias network that stabilizes Q1.
Step 4. Install R3, R4, and R5 to set the driver transistor’s operating point.
Step 5. Mount C2 and C3 close to Q2 for effective signal filtering.
Step 6. Attach Q3 and Q4 onto a large heatsink to control bold(heatsink requirement) during bold(class-A heat dissipation) operation.
Step 7. Install the main output capacitor C7 and ensure polarity is correct.
Step 8. Wire the speaker output terminal and confirm bold(Load) impedance is at least 8Ω.
Step 9. Connect the DC supply ensuring proper grounding and polarity.
Step 10. Power ON the circuit and monitor the idle current for bold(efficiency of class-A stages) compliance.
Step 11. Test the amplifier using an audio source and oscilloscope to verify bold(low distortion audio output) and stable waveform behavior.
FAQs
What does an audio amplifier do?
An audio amplifier boosts low-level sound signals to a higher level so they can drive speakers effectively.
How to make a 200 watt amplifier?
A 200W amplifier requires a high-power output stage, a strong power supply, proper heat management, and a suitable circuit topology such as Class-AB or Class-D.
Which class amplifier is best for sound?
Class-A offers the cleanest sound quality, while Class-AB provides a balance of efficiency and audio performance.
Will an amplifier make speakers louder?
Yes, an amplifier increases signal power, allowing speakers to play at higher volume with better control.
Can I use 150 watt amp to 100 watt speakers?
You can, as long as you avoid pushing the amplifier to maximum output to prevent speaker damage.
How to improve audio sound quality?
Use clean amplification, quality speakers, proper wiring, and ensure the audio source has minimal distortion.