
Introduction
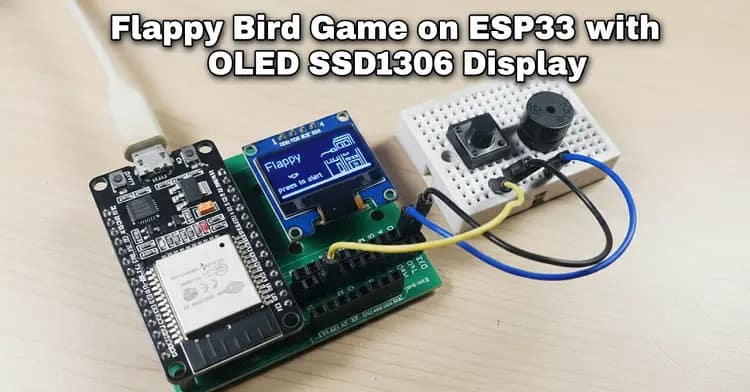
Designing a handheld project on the ESP32 becomes far more engaging when you implement something interactive like a Flappy Bird Game. Using the SSD1306 OLED display, this build demonstrates how microcontrollers handle graphics rendering, motion updates, and real-time control.
The Flappy Bird Game framework helps you understand obstacle movement, button-triggered actions, and smooth animation loops on limited hardware. With the ESP32’s speed, the Flappy Bird Game runs efficiently while showcasing essential embedded concepts.
By integrating I2C communication, structured game logic, and optimized drawing routines, the Flappy Bird Game turns into an excellent learning platform for beginners and hobbyists. Overall, this Flappy Bird Game project offers practical insight into microcontroller-based 2D animation.
For extra resources and similar DIY handheld electronics, check related guides on SekhoHub.online.
How the System Works
This build uses a compact ESP32 and an OLED SSD1306 128×64 display module. The ESP32 communicates with the display through I2C (SDA/SCL pins). A push button acts as the control input for vertical character movement. The buzzer gives audio feedback when scoring or hitting an obstacle. The screen draws the bird (a pixel block), moving pipes, and score counter. Every frame is updated using a continuous loop, controlling animation timing, frame buffer refresh, and collision logic.
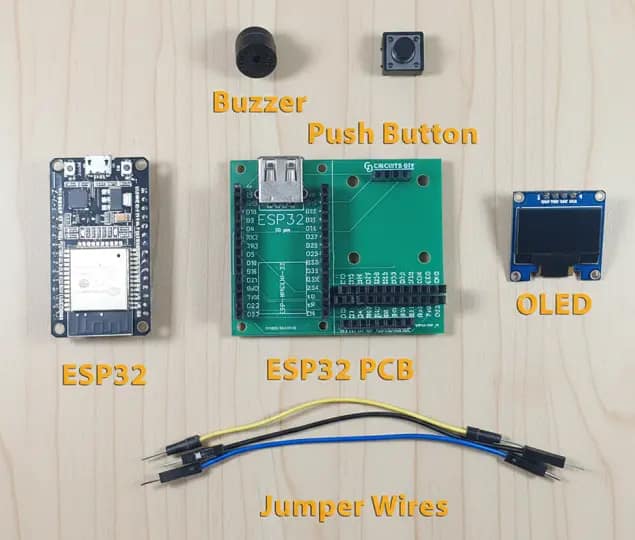
Components List
| Component | Value / Model | Qty | Buy Link |
|---|---|---|---|
| ESP32 | – | 1 | Buy |
| OLED Display | SSD1306 128×64 | 1 | Buy |
| Buzzer | – | 1 | Buy |
| Push Button | – | 1 | Buy |
| Jumper Wires | – | 1 Set | Buy |
| DC Power Supply | 5V for ESP32 | 1 | Buy |
Wiring / Connections
| ESP32 Pin | OLED Pin | Push Button | Buzzer |
|---|---|---|---|
| 3V3 | VCC | – | – |
| GND | GND | GND | GND |
| GPIO21 | SDA | – | – |
| GPIO22 | SCL | – | – |
| GPIO4 | – | One Leg | – |
| GPIO23 | – | – | +VE |
Notes:
The push button’s second leg goes to 3.3V through a pull-up or pull-down depending on code logic.
The buzzer may need a current-limiting resistor depending on model.
Ensure jumpers are tight to avoid display flicker or I2C noise.
Circuit Diagram Explanation

The ESP32’s SDA and SCL pins connect to the SSD1306 OLED display through I2C. This setup minimizes wiring complexity while maintaining a clean signal path. The display’s low power consumption makes it ideal for microcontroller gaming projects. The push button is wired to GPIO4 and an appropriate reference voltage so that any press is registered as a digital input event. The buzzer connects to GPIO23 and GND to provide simple alerts or sound effects within the game loop.
The ESP32 runs the game logic: reading button input, updating vertical movement, drawing pipe obstacles, checking collisions, and refreshing the frame buffer. The SSD1306 library (Adafruit or U8g2) handles rendering the graphics, including animation frames, character motion, and pipe transitions.
ESP32 Pinout.

Game Logic Overview
Below is the functional overview of the game engine:
1. Character Movement
The bird character reacts to button presses. Each press applies upward velocity. Gravity continuously pulls the character down. This creates fluid movement similar to classic 2D pixel animations.
2. Obstacle Movement
Pipes slide horizontally across the display. Their spacing and gaps vary to keep gameplay interesting. Pipe position updates every frame.
3. Collision Detection
Collision checks include:
Pipe boundary detection
Top or bottom screen contact
Narrow gap interactions
If the character touches any boundary, the game ends.
4. Score Handling
Every time the character successfully passes a pipe, the score counter increments and may trigger a sound alert using the buzzer.
5. Frame Buffer Handling
The SSD1306 frame buffer renders images quickly and efficiently. ESP32’s processing capability ensures animation feels smooth, even with limited pixel density.
Step-by-Step Build Guide
Step 1. Gather all components and verify the display orientation before assembling.
Step 2. Mount the ESP32 and OLED SSD1306 on a breadboard ensuring stable voltage and ground alignment.
Step 3. Connect VCC and GND of the OLED to 3.3V and ground of the ESP32.
Step 4. Wire SDA (ESP32 GPIO21) to the OLED SDA pin.
Step 5. Wire SCL (ESP32 GPIO22) to the OLED SCL pin.
Step 6. Insert the push button and connect one leg to GPIO4.
Step 7. Add a pull-up or pull-down resistor based on your preferred logic state.
Step 8. Connect the second leg of the button to ground.
Step 9. Connect GPIO23 to the positive terminal of the buzzer.
Step 10. Connect the buzzer’s negative terminal to ground.
Step 11. Power the ESP32 using a 5V DC supply or USB source.
Step 12. Install the required libraries in Arduino IDE (Adafruit SSD1306 or U8g2).
Step 13. Load the provided game sketch, ensuring I2C addresses match your OLED module.
Step 14. Upload the code to the ESP32 and observe the initial splash screen.
Step 15. Press the button to control the bird’s motion and test obstacle movement, scoring, and collisions.
ESP32 Code.
#include <Wire.h> // Only needed for Arduino 1.6.5 and earlier
#include “SSD1306Wire.h” // legacy include: `#include “SSD1306.h”`
#include “images.h”
#include “fontovi.h”SSD1306Wire display(0x3c, 21, 22);
#define DEMO_DURATION 3000
typedef void (*Demo)(void);float zidx[4];
int prazan[4];
int razmak=32;
int sirinaProlaza=30;
void setup() {Serial.println();
Serial.println();pinMode(2,OUTPUT);
pinMode(23,OUTPUT);
pinMode(4,INPUT_PULLUP);
display.init();for(int i=0;i<4;i++)
{
zidx[i]=128+((i+1)*razmak);
{prazan[i]=random(8,32);}
}display.flipScreenVertically();
display.setFont(ArialMT_Plain_10);}
// display.drawProgressBar(0, 32, 120, 10, progress);
// display.setPixel(i, i);
// display.drawXbm(34, 14, WiFi_Logo_width, WiFi_Logo_height, WiFi_Logo_bits);
//display.fillCircle(96, 32, 32 – i* 3);//display.drawRect(12, 12, 20, 20);
//display.setFont(ArialMT_Plain_10);
// display.setColor(WHITE);// display.fillRect(14, 14, 17, 17);
int score=0;
int stis=0;
float fx=30.00;
float fy=22.00;
int smjer=0;
unsigned long trenutno=0;int igra=0;
int frame=0;
int sviraj=0;
unsigned long ton=0;
void loop() {display.clear();
if(igra==0)
{
display.setFont(ArialMT_Plain_16);
display.drawString(0,4,”Flappy “);
display.drawXbm(0, 0, 128, 64, pozadina);
display.drawXbm(20, 32, 14, 9, ptica);display.setFont(ArialMT_Plain_10);
display.drawString(0,44,”press to start”);
if(digitalRead(4)==0)
igra=1;
}if(igra==1)
{
display.setFont(ArialMT_Plain_10);
display.drawString(3,0,String(score));if(digitalRead(4)==0)
{
if(stis==0)
{
trenutno=millis();
smjer=1;
sviraj=1;
stis=1;
ton=millis();}
}else{stis=0;}
for(int j=0;j<4;j++){
display.setColor(WHITE);
display.fillRect(zidx[j],0,6,64);
display.setColor(BLACK);
display.fillRect(zidx[j],prazan[j],6,sirinaProlaza);}
display.setColor(WHITE);
// display.fillCircle(fx, fy, 4); // igrac
display.drawXbm(fx, fy, 14, 9, ptica);for(int j=0;j<4;j++)
{
zidx[j]=zidx[j]-0.01;
if(zidx[j]<-7){
score=score+1;digitalWrite(23,1);
prazan[j]=random(8,32);zidx[j]=128;
}
}
if((trenutno+185)<millis())
smjer=0;if((ton+40)<millis())
sviraj=0;if(smjer==0)
fy=fy+0.01;
else
fy=fy-0.03;if(sviraj==1)
digitalWrite(23,1);
else
digitalWrite(23,0);if(fy>63 || fy<0){
igra=0;
fy=22;
score=0;
digitalWrite(23,1);
delay(500);
digitalWrite(23,0);
for(int i=0;i<4;i++)
{
zidx[i]=128+((i+1)*razmak);
{prazan[i]=random(4,30);}
}
}for(int m=0;m<4;m++)
if(zidx[m]<=fx+7 && fx+7<=zidx[m]+6)
{if(fy<prazan[m] || fy+8>prazan[m]+sirinaProlaza){
igra=0;
fy=22;
score=0;
digitalWrite(23,1);
delay(500);
digitalWrite(23,0);
for(int i=0;i<4;i++)
{
zidx[i]=128+((i+1)*razmak);
{prazan[i]=random(8,32);}
}
}}
display.drawRect(0,0,128,64);
}display.display();
}
Game Performance Optimization Tips
Reduce screen clearing operations for smoother frame updates.
Use integer math instead of floating-point where possible.
Optimize refresh rate balancing to avoid tearing.
Adopt compressed sprite drawing to save memory.
Keep I2C bus clean to minimize display anomalies.
Minimize heavy loops or delay() functions to maintain fluid animation.
Common Issues and Fixes
Display Not Powering
Verify VCC and GND.
Ensure 3.3V output is stable.
I2C Address Mismatch
Scan I2C bus using an address scanner tool.
Correct the address in code.
Button Not Responding
Check pull-up/pull-down setup.
Confirm GPIO configuration in code.
Choppy Animation
Reduce drawing operations.
Check for unintended delays in the main loop.
Game Reset Loop
Debounce button input to prevent noise triggers.
FAQs
Why did Flappy Bird get removed?
It was removed by the creator due to stress, unwanted attention, and concerns that the game had become too addictive for players.
Is Flappy Bird coming back in 2025?
There is no official confirmation. The original game is unlikely to return, but many clones and remakes remain available.
Can you still play Flappy Bird?
Yes, you can play it on devices that still have it installed or through online clones and recreated versions.
How to play games for free?
You can download free games from app stores, access open-source titles, or use websites offering free browser-based games.
What is the most popular free game app?
Titles like Roblox, Subway Surfers, and Candy Crush consistently rank among the most downloaded free game apps.
Conclusion
Building this compact version of the Flappy Bird concept on an ESP32 with an OLED SSD1306 display demonstrates how even limited hardware can handle smooth graphics, responsive input control, and reliable game loop behavior. The project brings together I2C communication, lightweight animation, button-based interaction, and structured coding techniques that apply to many other microcontroller gaming builds.
With only a few components and efficient programming, you can transform a simple setup into a fully playable handheld experience. This foundation also opens the door to more advanced game ideas, display optimizations, or multi-input controls for future DIY electronics projects.