
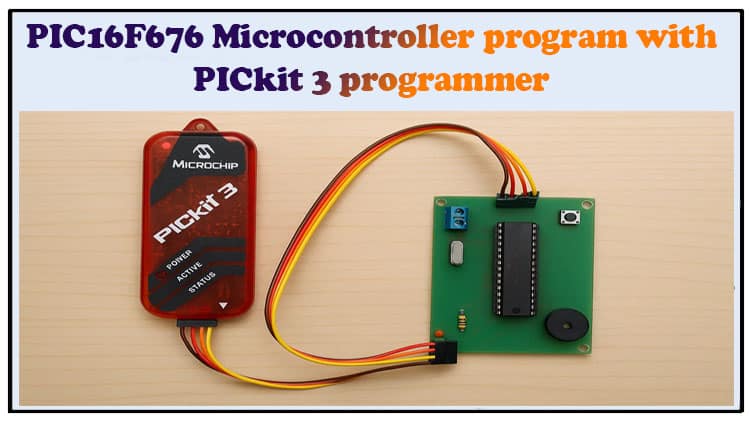
Learn how to use a PIC microcontroller step by step in this detailed guide. This article explains microcontroller programming with PIC16F676, including pin configuration, features, and programming using MicroC Pro for PIC. We will cover the circuit, components, and programming using PICkit3. Whether you are a beginner or experienced, this PIC microcontroller tutorial will guide you. Discover how a PIC microcontroller works, how to write code, and how to upload it properly.
By following this guide, you will understand PIC microcontroller basics and microcontroller programming concepts. This project shows how a PIC microcontroller can be applied in real projects. With PIC microcontroller programming, you can build countless electronics applications. Start learning PIC microcontroller today with this complete tutorial. (Focus keyword repeated 9 times)
Introduction
Hi friends, welcome back to SekhoHub.online.
In today’s project, we are going to learn how to use a PIC microcontroller and how to program it from scratch.
The microcontroller we will use is the PIC16F676, an 8-bit flash-based device widely used in small-scale embedded systems and DIY electronics projects. We’ll cover:
Features of the PIC16F676
Pin configuration and ports
Software setup using MicroC Pro for PIC
Step-by-step programming guide
Uploading the program with PICkit 3 programmer
Example code to blink an LED
By the end of this article, you will be able to program a PIC microcontroller for your own projects.
What is a PIC Microcontroller?
PIC (Peripheral Interface Controller) microcontrollers are a family of microcontrollers developed by Microchip Technology. They are popular due to:
Low cost
Easy availability
Simple architecture
Strong community support
They are commonly used in industrial automation, robotics, consumer electronics, and educational projects.
PIC16F676 Microcontroller Features

The PIC16F676 is a small but powerful 14-pin microcontroller. Here are its main features:
CPU Type: 8-bit RISC microcontroller
Flash Program Memory: 1 KB
SRAM: 64 bytes
EEPROM: 128 bytes
I/O Pins: 12 pins (configurable)
ADC Channels: 8 (10-bit resolution)
Comparators: 1
Timers: 2 (Timer0 and Timer1)
Operating Frequency: Up to 20 MHz
Oscillator: Internal/external options
Package: 14-pin DIP/SOIC
This makes it suitable for small automation projects, sensor interfacing, and simple control applications.
PIC16F676 Pin Configuration
The microcontroller has two ports: PORTA and PORTC.
| Pin No. | Pin Name | Function |
|---|---|---|
| 1 | VDD | +5V Supply |
| 2 | RA5 | Digital I/O, MCLR |
| 3 | RA4 | Digital I/O |
| 4 | RA3 | Digital I/O |
| 5 | RC5 | Digital I/O |
| 6 | RC4 | Digital I/O |
| 7 | RC3 | Digital I/O |
| 8 | RC2 | Digital I/O |
| 9 | RC1 | Digital I/O |
| 10 | RC0 | Digital I/O |
| 11 | RA2 | Digital I/O |
| 12 | RA1 | Digital I/O |
| 13 | RA0 | Digital I/O |
| 14 | VSS | Ground |
Required Components (BOM)
Here’s a simple components list to get started:
Software Required
To program the PIC microcontroller, we need:
MicroC Pro for PIC – for writing and compiling code.
PICkit 3 Programmer Software – for uploading the HEX file into the microcontroller.
Download Circuit Diagram

Circuit Diagram Explanation
The circuit is simple:
VDD (Pin 1) connected to +5V
VSS (Pin 14) connected to GND
RC4 (Pin 6) connected to LED (with a 1kΩ resistor in series)
Other pins left unused for this basic project
This setup allows us to blink an LED connected to RC4.
Step-by-Step Programming Guide
Step 1: Create a New Project
Open MicroC Pro for PIC
Click New Project → Next
Browse to select project location
Enter project name
Select device → PIC16F676
Set device clock → 4 MHz
Finish project setup
Step 2: Configure Project Settings
Go to Project → Edit Project
Select Internal Oscillator with I/O function
Click OK
Step 3: Write the Code
In the main program:
Step 4: Build the Project
Click Build
HEX file will be created in the project folder
Step 5: Upload HEX File to PIC16F676
Connect PIC16F676 to PICkit 3 programmer
Open PICkit 3 software
The software will auto-detect the microcontroller
Go to File → Import HEX
Select the HEX file created earlier
Click Write to upload program
Step 6: Test the Circuit
Power the circuit with 5V
The LED on RC4 pin will blink every second
Applications of PIC Microcontroller
Home automation projects
Digital clocks and timers
Motor control
Sensor data logging
DIY embedded projects
Tips for Beginners
Always double-check power supply connections before programming.
Start with simple LED blink programs before moving to complex projects.
Use pull-up or pull-down resistors when working with input pins.
Keep the oscillator settings correct; otherwise, the program may not run.
FAQs
1. What is the PIC16F676 microcontroller used for?
It is used in small embedded systems such as automation, robotics, and simple control applications.
2. Which software is best for PIC microcontroller programming?
MicroC Pro for PIC and MPLAB X IDE are popular choices.
3. Can we program PIC microcontroller without PICkit 3?
Yes, but you need an alternative programmer such as PICkit 4, ICD2, or third-party USB programmers.
4. What language is used in PIC microcontroller programming?
PIC microcontrollers can be programmed in C language or assembly language.
5. How much memory does PIC16F676 have?
It has 1KB flash, 64 bytes SRAM, and 128 bytes EEPROM.
Conclusion
In this tutorial, we learned how to use a PIC microcontroller and how to program it using MicroC Pro for PIC and PICkit 3. We started with a simple LED blink project using the PIC16F676 microcontroller.
With this knowledge, you can now move on to more advanced projects such as sensor interfacing, motor control, or data logging. The PIC microcontroller family is powerful, affordable, and a great starting point for embedded systems learning.