

7 Powerful Insights into Ultrasonic Sensor (HC-SR04) and Arduino Nano Project
The Ultrasonic Sensor HC-SR04 is one of the most reliable modules for measuring distance in DIY electronics and Arduino projects. In this detailed guide, you will learn what an Ultrasonic Sensor HC-SR04 is, how it works, and why it is widely used in robotics, obstacle avoidance systems, and automation projects. We will cover its working principle, pinout, and the technical explanation of how sound waves reflect to measure distance accurately.
You will also get a complete circuit connection using Arduino Nano, breadboard, and jumper wires to build your own distance measurement system. Additionally, we provide a full bill of materials, step-by-step assembly guide, and example Arduino code to test and calibrate the HC-SR04 sensor. This guide is designed for electronics students, hobbyists, and makers who want to explore ultrasonic distance measurement with Arduino.
Introduction
Ultrasonic sensors have become an essential component in modern electronics projects, especially in robotics, automation, and obstacle avoidance systems. Among them, the Ultrasonic Sensor HC-SR04 is one of the most commonly used modules due to its accuracy, low cost, and ease of interfacing with microcontrollers like Arduino Nano.
In this article, we will explore:
What the Ultrasonic Sensor HC-SR04 is
How it works using sound waves
Technical details and pinout
A complete Arduino Nano project with connections, code, and testing
Practical applications and FAQs
This guide is written for beginners, students, and electronics hobbyists who want to understand distance measurement with HC-SR04.
What is an Ultrasonic Sensor (HC-SR04)?
The HC-SR04 Ultrasonic Sensor is a distance measuring module that works by sending ultrasonic sound waves and measuring the time it takes for the echo to return.
It can measure distances from 2 cm to 400 cm (4 meters).
It provides accuracy up to ±3 mm.
It operates at 40 kHz ultrasonic frequency, which is inaudible to humans.
Simply put: The HC-SR04 acts like a bat, sending sound and listening for the echo to judge how far an object is.
⚙️ How Ultrasonic Sensor HC-SR04 Works
The HC-SR04 uses the Time of Flight (ToF) principle.
Trigger Pulse – Arduino sends a HIGH signal (10 µs) to the Trigger pin.
Sound Emission – The sensor transmits an ultrasonic burst (8 cycles of 40 kHz).
Echo Reception – If an object is in front, sound waves bounce back.
Echo Pin Signal – The sensor outputs a HIGH pulse for the duration sound took to return.
Distance Calculation – Arduino measures this time and converts it to distance using:
Distance (cm)=Time (µs)×0.03432\text{Distance (cm)} = \frac{\text{Time (µs)} × 0.0343}{2}
0.0343 cm/µs= Speed of soundDivide by 2 because the wave travels to the object and back
HC-SR04 Sensor Pinout

| Pin | Name | Function |
|---|---|---|
| 1 | VCC | Power supply (+5V) |
| 2 | TRIG | Trigger input (Arduino generates a pulse) |
| 3 | ECHO | Output pulse (time taken for echo) |
| 4 | GND | Ground connection |
Technical Specifications
Operating Voltage: 5V DC
Current Consumption: 15 mA
Measuring Range: 2 cm – 400 cm
Accuracy: ±3 mm
Measuring Angle: 15° cone
Frequency: 40 kHz
Dimensions: 45 mm x 20 mm x 15 mm
Materials for the Project (Ultrasonic Sensor HC-SR04)
| Component | Quantity | Description | Link |
|---|---|---|---|
| Arduino Nano | 1 | Microcontroller board | Click & Buy |
| HC-SR04 Ultrasonic Sensor | 1 | Distance measuring sensor | Click & Buy |
| Breadboard | 1 | For prototyping | Click & Buy |
| Jumper Wires | As required | Male-to-Male/Female | Click & Buy |
| USB Cable | 1 | For Arduino Nano | Click & Buy |
Useful Tools
| Tool | Quantity | Purpose / Notes | Click & Buy |
|---|---|---|---|
| Soldering Iron Kit | 1 | For making permanent connections | Click & Buy |
| Solder Wire (60/40, 0.8mm) | 1 | Electrical soldering | Click & Buy |
| Wire Stripper & Cutter | 1 | Stripping jumper wires | Click & Buy |
| Mini Screwdriver Set | 1 | For module and relay terminal screws | Click & Buy |
| Multimeter | 1 | Testing voltages and continuity | Click & Buy |
| Hot Glue Gun (optional) | 1 | Securing components in place | Click & Buy |
| Small Pliers | 1 | Holding and bending wires | Click & Buy |
| Heat Shrink Tubing Set | 1 | Insulating exposed wires | Click & Buy |
Download Circuit Diagram

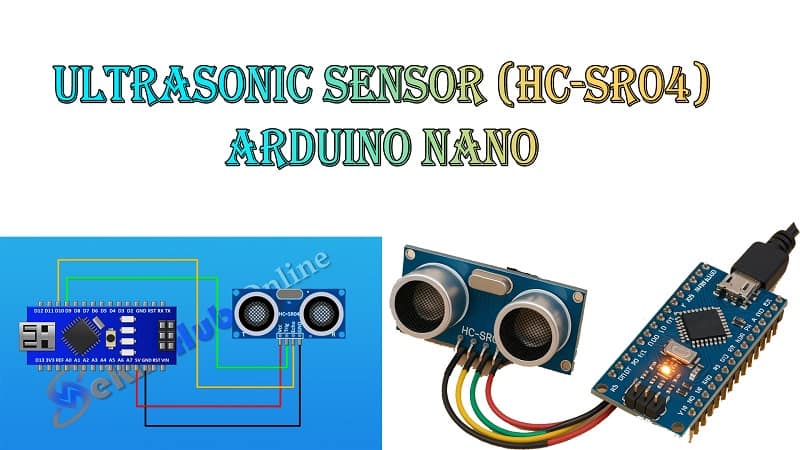
Circuit Diagram & Explanation
Connections between Arduino Nano and HC-SR04:
VCC → 5V of Arduino Nano
GND → GND of Arduino Nano
TRIG → Digital Pin D9
ECHO → Digital Pin D10
When you press upload, Arduino will send pulses via TRIG pin, measure the echo duration, and then calculate distance.
Step-by-Step Guide to Build the Project
Step 1: Prepare Components
Place Arduino Nano on the breadboard.
Connect the HC-SR04 sensor with jumper wires.
Step 2: Wiring
Follow the pin connections listed above.
Double-check power (5V and GND) to avoid damage.
Step 3: Upload Arduino Code
Use the following example sketch:
Step 4: Open Serial Monitor
Go to Tools > Serial Monitor in Arduino IDE.
Set baud rate to 9600.
You will see distance readings in centimeters.
Applications of HC-SR04 Sensor
Obstacle detection in robots
Level measurement (water tank, grain silos)
Parking sensors in cars
Automatic doors and security systems
Smart home automation (object presence detection)
❓ FAQs
Q1. What is the range of HC-SR04 sensor?
It can measure from 2 cm to 400 cm.
Q2. Can I use HC-SR04 with 3.3V Arduino boards?
Yes, but you must use a voltage divider for the Echo pin.
Q3. Why are my readings unstable?
Common reasons: electrical noise, shiny/absorbent objects, wrong wiring.
Q4. How accurate is the HC-SR04?
±3 mm under ideal conditions.
Q5. Can I use multiple sensors together?
Yes, but trigger them sequentially to avoid interference.