
Introduction to Water Pump Dry Run Protection
A water pump dry run protection system is essential to prevent your pump from running without water, which can cause overheating and permanent damage. By integrating an Arduino with a flow sensor and a relay, you can automate pump control efficiently. This project demonstrates a reliable dry run protection circuit for any standard water pump, making it ideal for DIY enthusiasts, electronics hobbyists, and practical household applications.
With this system, the pump will automatically turn off when water flow stops and resume operation when flow is detected. This prevents mechanical wear and ensures energy-efficient pump operation. You can also check out our Arduino relay projects for more automation ideas.

Materials for the Project
Components Required for the Dry Run Protection Circuit
| Component | Quantity | Description | Buy Link |
|---|---|---|---|
| Arduino Nona | 1 | Main microcontroller board | AliExpress |
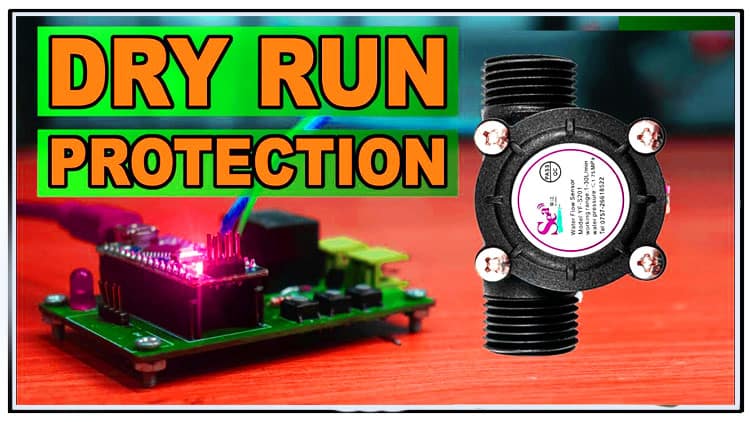
| Flow Sensor | 1 | Water flow detection sensor | AliExpress |
| 5V Relay Module | 1 | To switch the water pump | AliExpress |
| BC547 Transistor | 1 | Amplifies control signal | AliExpress |
| 1N4148 Diode | 1 | Protection diode for relay coil | AliExpress |
| Push Button | 1 | Manual on/off control | AliExpress |
| LED | 1 | Status indicator | AliExpress |
| 1K Resistor | 1 | For transistor base current limiting | AliExpress |
| 100Ω Resistor | 1 | For LED current limiting | AliExpress |
| 2-Pin Terminal Block | 2 | For easy connections | AliExpress |
| Connecting Wires | As needed | For circuit connections | AliExpress |
You can also view our Arduino project components guide for more details on these parts.
Understanding the Circuit Diagram
The water pump dry run protection circuit works by detecting water flow using a flow sensor. When the pump is powered, the Arduino monitors the sensor. If water is flowing, the relay remains energized, allowing the pump to operate. If no water flow is detected for a predefined time, the Arduino deactivates the relay, stopping the pump to prevent damage.
Key connections:
Flow sensor outputs to Arduino digital pin (D2).
Relay coil is controlled via BC547 transistor (D4 pin).
Push button allows manual on/off control (D3 pin).
LED indicates pump operation status.
Download Circuit Diagram

You can also check our Arduino flow sensor tutorials for similar projects.
Step-by-Step Build Guide for Water Pump Dry Run Protection
Step 1. Connect the Arduino Uno to your breadboard or project setup.
Step 2. Connect a two-pin terminal block: one pin to 5V on Arduino, the other to GND.
Step 3. Connect a push button: one pin to D3 on Arduino, the other to GND.
Step 4. Insert a BC547 transistor: connect pin 3 (emitter) to GND.
Step 5. Connect a 1K resistor: one end to D4 on Arduino, the other to pin 2 (base) of the transistor.
Step 6. Connect a 5V relay: coil pins to transistor pin 1 (collector) and 5V on Arduino.
Step 7. Connect a two-pin terminal block: one pin to the normally open (NO) terminal, the other to the common (COM) terminal of the relay.
Step 8. Add a 1N4148 diode: anode to transistor collector (pin 1), cathode to 5V on Arduino.
Step 9. Connect a 100Ω resistor: one end to 5V, the other to the LED anode. LED cathode connects to transistor collector.
Step 10. Connect the flow sensor: red wire to 5V, black to GND, yellow signal wire to D2 on Arduino.
Step 11. Verify all connections before uploading code.
Step 12. Upload the Arduino sketch and test the circuit. The relay should turn on when the pump is running, and automatically turn off when no water flow is detected.
For more step-by-step guides, see our Arduino project tutorials.
Arduino Code
int tm;
bool st,sst,wf,pmp;
void setup() {
// put your setup code here, to run once:
pinMode(2,INPUT_PULLUP);
pinMode(3,INPUT_PULLUP);
pinMode(4,OUTPUT);
Serial.begin(9600);
}void loop() {
// put your main code here, to run repeatedly:
if(!digitalRead(2)){
st=0;}
if(digitalRead(2)&!st){
st=1;
tm=0;
}
if(digitalRead(3)){
sst=0;}
if(!digitalRead(3)&!sst){
sst=1;
pmp=!pmp;
tm=0;
}digitalWrite(4,pmp);
delay(100);
if(tm<50){tm++;
wf=1;
} else wf=pmp=0;
}
Uploading Arduino Code and Testing
Open the Arduino IDE.
Connect the Arduino to your PC via USB.
Copy and paste the dry run protection code.
Upload the code to the Arduino.
Turn on the pump manually using the push button.
Observe: LED lights when the pump is running, and the relay deactivates automatically if water flow stops.
You may also refer to our Arduino coding tutorials for guidance.
Troubleshooting Common Issues
Pump does not start: Check relay connections and power supply.
Relay stays on with no flow: Ensure flow sensor is connected to D2 and functioning.
LED not lighting: Verify resistor and LED orientation.
False triggers: Check for loose wires or inconsistent sensor readings.
More troubleshooting tips are available on our Arduino troubleshooting guide.
FAQs About Water Pump Dry Run Protection
Q1. What is dry run protection?
Dry run protection prevents the pump from operating without water, protecting it from overheating and damage.
Q2. Can I use this system with any water pump?
Yes, as long as the pump operates on the relay’s voltage and current rating.
Q3. Can I adjust the time delay before the pump shuts off?
Yes, by modifying the Arduino sketch delay for flow detection.
Q4. Is the flow sensor necessary?
Yes, it detects water flow and is essential for automatic dry run protection.
Q5. Can I use a different microcontroller?
Yes, other microcontrollers like ESP32 or Arduino Nano can work with minor code adjustments.
See more FAQs on Arduino water pump projects.
Conclusion
This Arduino-based water pump dry run protection project ensures your pump operates safely, preventing damage due to dry running. With the complete step-by-step guide, BOM, circuit diagram, and internal links to related tutorials, this project is ideal for DIY enthusiasts and electronics engineers alike. Build your own automatic water pump controller today and safeguard your water system.
