
This Arduino tutorial introduces beginners to Arduino in a simple and practical way. In this Arduino tutorial, you will learn what Arduino is, how Arduino boards work, and how to set up the Arduino IDE. The Arduino tutorial also explains Arduino Uno pin configuration and its features. With this Arduino tutorial, you can build your first project: a blinking LED.
The Arduino tutorial provides a BOM list, circuit explanation, and step-by-step guide. Using this Arduino tutorial, you will understand how to power the board, connect components, and upload code. The Arduino tutorial even includes the default blink code from the IDE. This Arduino tutorial is perfect for students, hobbyists, and DIY makers. By following this Arduino tutorial, you will gain confidence in programming microcontrollers. Start your learning journey today with this beginner-friendly Arduino tutorial.
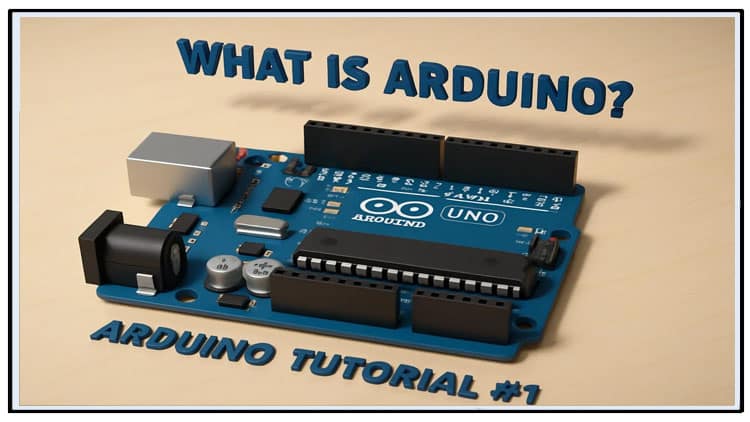
Introduction Arduino Tutorial 1
Hi friends!
Welcome to the first project of my Arduino training series.
In this series, we will explore:
What Arduino is
How to program Arduino
How we can use Arduino in real projects
This is the very beginning, and we’ll start simple. By the end of this tutorial, you’ll know how Arduino works and how to build your first project: a blinking LED circuit.
So without further ado, let’s dive in.
What is Arduino?
Arduino is an open-source electronics platform based on easy-to-use hardware and software.
At its core, an Arduino board is a microcontroller-based circuit board.
It allows us to connect sensors, actuators, and other devices.
With simple programming, we can make interactive projects.
Some key features:
Microcontroller: handles processing
Digital and analog pins: interface with the outside world
USB connectivity: program and power the board
Open-source software: Arduino IDE for writing and uploading code
Arduino is widely used in education, prototyping, hobby projects, and even industrial applications.
Types of Arduino Boards
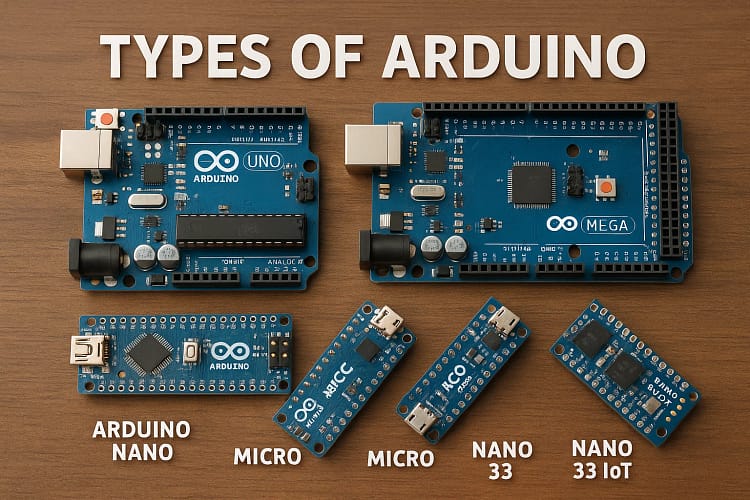
There are many Arduino boards available:
Arduino Uno (most popular and beginner-friendly)
Arduino Nano
Arduino Mega
Arduino Leonardo
Arduino Due
For this tutorial, we will use the Arduino Uno because it’s simple, widely available, and perfect for beginners.
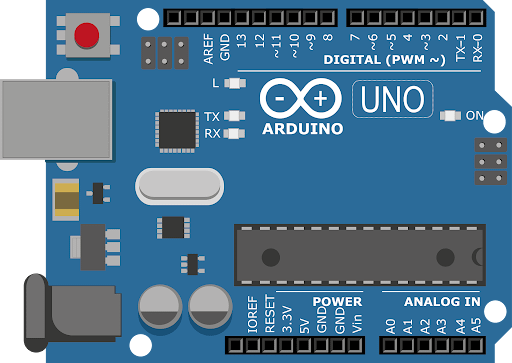
Arduino Uno Board Overview
The Arduino Uno is based on the ATmega328P microcontroller. Let’s break down its important features:

14 Digital I/O Pins
Pins can be configured as input or output.
Pin 0 and 1 are used for serial communication (TX/RX).
Some pins can output PWM signals (marked with ~).

6 Analog Input Pins (A0–A5)

These can read analog signals (0–5V).
Useful for sensors like temperature, light, or potentiometers.

Power Pins
Vin pin: Connect 7–9V external power.
5V pin: Regulated output for other components.
3.3V pin: For low-voltage devices.
GND pins: Ground reference.
USB Port
For programming and powering Arduino from a computer.
Reset Button
Restarts the program loaded into the microcontroller.

Arduino IDE (Software)

Arduino programming is done in the Arduino IDE (Integrated Development Environment).
When you open the IDE, you’ll always see two functions:
void setup()→ Runs once when the board is powered on or reset.void loop()→ Runs continuously in a loop, again and again.
This simple structure makes programming very beginner-friendly.
First Project: Blinking LED
The best way to start learning Arduino is with the classic LED blink project.
This project will show you how to:
Connect an LED to Arduino
Upload code from the Arduino IDE
See your first program in action
Bill of Materials (BOM)
Here’s what you’ll need for this project:
| S.No | Component | Quantity | Buy Link (Placeholder) |
|---|---|---|---|
| 1 | Arduino Uno | 1 | [Buy Here] |
| 2 | Breadboard | 1 | [Buy Here] |
| 3 | LED (5mm, red) | 1 | [Buy Here] |
| 4 | Resistor (100Ω) | 1 | [Buy Here] |
| 5 | Jumper wires | 5–6 | [Buy Here] |
| 6 | USB Cable (A-B) | 1 | [Buy Here] |
Circuit Diagram Explanation
The circuit is very simple:
Connect Arduino’s 5V pin to the positive rail of breadboard.
Connect Arduino’s GND pin to the negative rail.
Place the LED on the breadboard.
Positive leg (anode) → Arduino pin D13.
Negative leg (cathode) → One end of 100Ω resistor.
Connect the other end of the resistor to breadboard ground rail.
This way, when pin D13 outputs HIGH, current flows through the LED → resistor → ground, making the LED blink.
Circuit Diagram Illustration Prompt

“Create a neat breadboard circuit diagram showing Arduino Uno connected with an LED on pin 13 through a 100Ω resistor. Show power connections: Arduino 5V to breadboard positive rail and GND to negative rail. The LED’s anode should connect to pin 13, and cathode should go through the resistor to ground.”
Step-by-Step Guide
Prepare Components
Gather Arduino Uno, LED, resistor, jumper wires, and breadboard.
Power Connections
Connect Arduino’s 5V to the breadboard’s positive rail.
Connect Arduino’s GND to the negative rail.
LED Setup
Place LED on breadboard.
Connect anode (long leg) to Arduino pin 13.
Connect cathode (short leg) through 100Ω resistor to ground rail.
Connect to Computer
Plug Arduino into PC via USB cable.
Open Arduino IDE
Go to Tools → Board → Arduino Uno.
Go to Tools → Port and select the port showing “Arduino Uno.”
Load Example Code
Go to File → Examples → Basics → Blink.
The default blink sketch will open.
Upload Code
Click the Upload button.
Wait for “Done uploading” message.
Watch the LED Blink
The LED will blink ON for 1 second and OFF for 1 second continuously.
Arduino Blink Code (Default IDE Example)
How It Works
pinMode(LED_BUILTIN, OUTPUT);→ Sets pin 13 (built-in LED) as output.digitalWrite(LED_BUILTIN, HIGH);→ Turns LED ON.delay(1000);→ Waits for 1000 ms (1 second).digitalWrite(LED_BUILTIN, LOW);→ Turns LED OFF.delay(1000);→ Waits another second.Repeats forever in the loop.
FAQs
Q1. What is Arduino used for?
Arduino is used for making DIY electronics, robotics, IoT devices, and prototypes.
Q2. Why is Arduino Uno recommended for beginners?
Because it’s cheap, simple, and has enough features to cover most beginner projects.
Q3. Do I need external power to run Arduino?
No, Arduino can be powered directly from your computer’s USB port.
Q4. Can I use another pin instead of pin 13 for the LED?
Yes, you can use any digital I/O pin, just update the code accordingly.
Q5. What’s next after blinking LED?
You can try button inputs, multiple LEDs, or sensors like temperature and light.
Conclusion
In this first Arduino tutorial, we:
Learned what Arduino is and how it works
Explored Arduino Uno pin configuration
Understood Arduino IDE basics
Built our first project: Blinking LED
This simple experiment is the foundation of Arduino programming. From here, we’ll move on to more exciting projects in upcoming tutorials.